Introduction:
If you have ever found yourself reading my content before, or scrolled through my social media, you'll now I feel very strongly about providing our captive animals with the best possible environments. With the exotic-keeping hobby as a whole turning towards a more sustainable future, with captive breeding efforts, better husbandry, and technological advancement, creating a naturalistic setup is now as easy (and important!) as ever.
Harvest Mice are native to Europe and parts of Asia, and can be found in a vast variety of habitats, from grassland and farmland to salt marshes and hedgerows. With this in mind, I set out to create a setup that would turn out to be one of my favourite ever projects: the Hedgerow Tank. Let's find out how I created it!
Preparation:
Whenever I start a new project, I always like to have a clear vision, and I will often jot ideas down on paper and scroll through endless inspiring images for weeks before coming up with my exact intentions. Once this plan is made, it is possible to start the preparation of materials, find the right tank, and complete any further research.
The tank- Harvest Mice, as the smallest rodent in Europe, are amazingly agile, quick, and nimble. Therefore, your conventional barred rodent enclosure just won't cut it. The best option is to find a glass tank with a screen lid for plenty of ventilation. Exo Terra, Habistat, Swell and Komodo all produce variations of these tanks in a range of sizes, providing us with the perfect starting point. For this project, I used the Swell Reptiles 60x45x60cm glass terrarium, which provides more than enough space for our non-breeding group of 4. As evident in the photos below, this tank utilises not only a screen top, but also sides providing an excellent level of ventilation, and additional climbing opportunities. More information surrounding Harvest Mouse housing and care can be found under the 'Care' pages.
Here's a full list of all the materials I used to complete this project:
- 60x45x60cm glass terrarium
- Wooden planks sourced from a pallet
- Heavy duty Velcro
- Naturally sourced branches
- Native hedgerow browse
- Native grasses and wildflowers
- Hay
- Coconut hides
- Rocks
- Bird sand
- Arid reptile soil substrate
- Organic top soil/compost
- Food bowl
- Water bowl
You'll also need the following tools:
- Scissors
- Wood saw
Let's build!

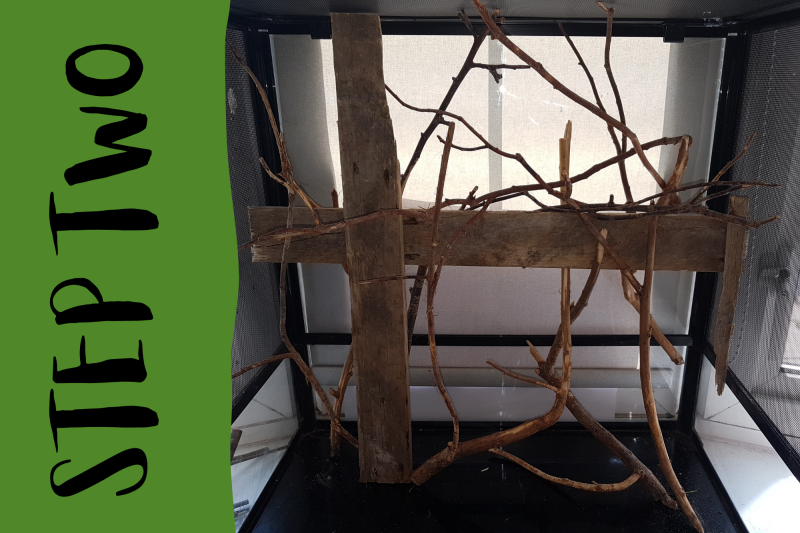
To provide a focal point for the setup, and to create structure to help us later in the build, I decided I wanted to construct a dilapidated fence for the hedgerow to seemingly 'grow' from. For this, I did some scavenging around the local area and came across a beautifully weathered pallet- immediately I was pulling it apart to take home!
When home, I set about cutting the wood to size using our wood hand saw, ensuring that each piece would fit snuggly in the tank. The two carefully measured lengths were then test fitted to the tank, before being attached together using heavy duty Velcro, which must be completely concealed to ensure the mice cannot access it. As the wood was cut to fit exactly, they were simply rested in place, and this proved to be secure enough. A small amount of additional Velcro or non-toxic hot glue could be used if this was deemed to be required.
The next step was to help the hedgerow come to life, using a variety of naturally occurring branches. There are several lists available online stating safe woods for rodents, but just some of those I used include:
- Apple
- Birch
- Hazel
- Willow
- Lime
Each of these is reasonably common in the UK, so easy to find.
When collecting your branches, it is important that you know exactly what species you are picking up, just in case something may be toxic. If you are ever uncertain, I highly recommend downloading a plant ID app to help you out with this task. You will also need to clean your branches before use to prevent the spread of diseases and parasites to your captive animals. There are several ways to do this. My preferred option is to pour boiling water direct from a kettle over your branches and allowing them to cool and dry out completely before use. This instantly kills much of the bacteria and parasites found on the wood, and means harsh chemicals aren't required, which could later prove fatal to the lives of your mice.
When placing the branches in the tank, I carefully considered the placement both in front of and behind the fence (which was situated approximately 2 inches from the back of the tank). This gives the appearance that the hedge has begun to engulf the human features of the environment, adding to the naturalistic, wild feel. Harvest Mice are incredible and unique creatures with prehensile tails, so a complex network of branches built to a reasonable height is ideal for the species.
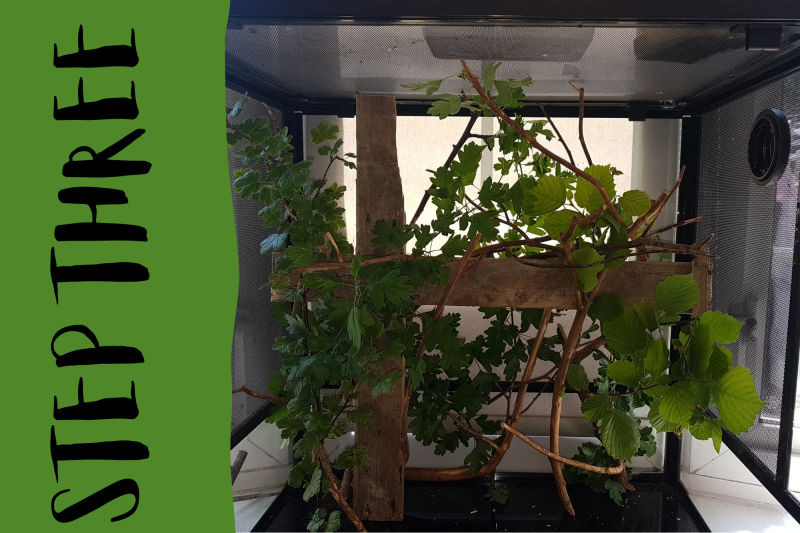
Step three is where the setup truly begins to come to life, providing not only a great look, but also a hugely enriching natural environment. Browse is not only enriching, but makes up a vital part of the diet of many animals, and can even be enjoyed by Harvest Mice. To maintain the theme of the tank, I chose to use UK native trees and shrubs, which I found around my local area. Some trees may be protected, so be sure to check this before cutting anything!
Species used for browse included Hawthorn, Hazel and Rowan, but any safe trees can be used. As the browse dies off and is chewed by the mice, it will need to be replaced as often as possible. I would recommend using different plants each time to maximise the enrichment potential of the habitat. I have found Hawthorn and Buddleia to be two of the favourites of our mice.

Now is time to begin adding substrate. I had decided that I would add substrate after the bulk of the background had been completed, just to make things slightly easier to take in and out whilst deciding on placement, but this step really could be done at any stage.
I used several layers of substrate in this build, beginning with an organic, peat-free soil (pictured above). This first layer was then heavily wetted to remain moist following the addition of the next substrate layers. I did this to allow the plants I added later to grow, whilst allowing the lifespan of the browse to be lengthened (achieved by placing the stems into the damp soil).
If you decide against using any live plants in your tank, this step could be completely ignored.
I had also found a spare rock in my décor supply cupboard, which I decided to add to provide additional interest to the setup.

In this step, I added the second substrate layer along with some live plants.
I had chosen to use an arid reptile soil designed for use in bioactive tanks, which contains plenty of nutrients to sustain plant growth, and has a very natural aesthetic. This substrate was thickly placed across the first layer, and sloped to the back to provide a sense of size and depth, but also ensure that all of the tips of the branching and browse were completely covered.
Alongside natural grasses, I also collected some wildflowers, including Buttercups, Cow Parsley (which looks very similar to toxic Hemlock) and a Field Poppy. Each of these was planted into the dampened soil layer and covered further with the arid reptile soil.
In hind sight, I likely would not use live plants in the setup due to the destructive nature of Harvest Mice. Instead, I would regularly collect long cuttings of native grasses and provide these. I like to choose grasses with plenty of seeds to allow natural feeding, although other long grasses can also be offered to tanks, especially those with females, to encourage natural nest building.
All plants and grasses collected for use in such a setup should be taken from areas free from pollution and pesticide usage. Rinsing thoroughly before giving plants to your mice may need to be considered.

The final substrate layer is made up of bird sand. As discussed in my Harvest Mouse care sheet, bird sand is an ideal, natural substrate which is easy to clean and helps to control odours. Again, I added a thick layer to the arid reptile soil, covering most of the front area.
A small amount of hay was then added to the back of the setup, covering the remaining soil, and providing ideal nesting material and places to hide.
Finally it's time to add the finishing touches to the setup.
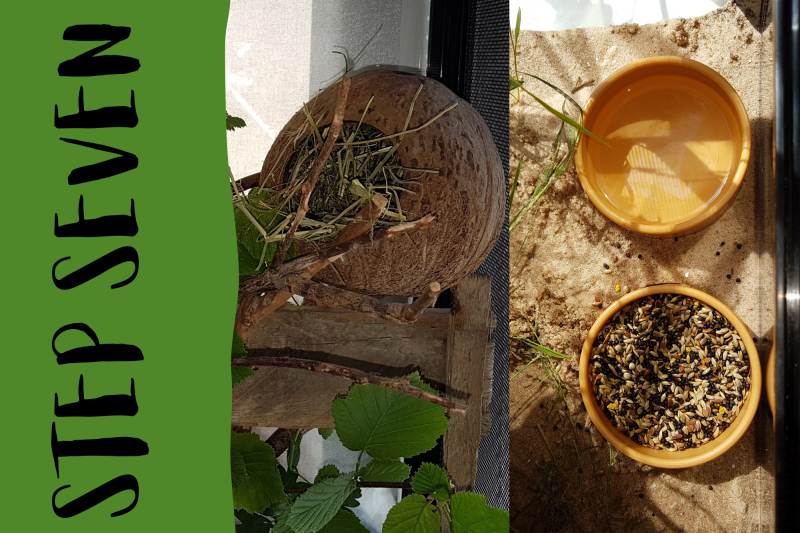
Two coconut nests were added to the corners of the setup, as high up as possible to replicate their natural behaviours. Each of these was filled with hay to provide the beginnings of a nest.
Food and water bowls were the last items to be added to the setup. For these, I used shallow plastic dishes at an easily accessible position at the front of the tank. An important addition to the water bowl (although this isn't pictured) is a pebble. As a small, active species, Harvest Mice may find themselves stuck in their water bowl, so a pebble will ensure that they can easily get out, preventing drowning.